
Visibility
Visibility decides which entries show up in the file list: the ones the system hides on its own, and the ones your own rules exclude. This page covers the three display tiers, how to write rules, how to hide a file straight from its context menu, and how to get something back once it has disappeared.
The whole thing lives on one settings page: open Settings and click Visibility in the General group. The Show Hidden Items toggle and the separate Hide Rules page that 0.19 and earlier had are now merged here — they were always two halves of the same thing.
The three tiers
At the top of the page is a three-segment control labelled Show hidden items:
| Tier | System-hidden items (dot-prefixed, hidden attribute) | Your rules |
|---|---|---|
| Hide | Hidden | Applied |
| Show | Shown | Still applied |
| Show all | Shown | All suspended |
Ctrl+H (⌘+Shift+. on macOS) flips between the first two; Show all can only be picked here. That is what the line under the control means: Ctrl+H toggles the first two; the third is only selectable here.
The first two tiers differ only in what they do to system-hidden items. Your own rules apply in both. When you want to see absolutely everything for a moment, use the third.
If something vanished, switch to Show all first. That tier lets both system-hidden items and every one of your rules through, which tells you whether one of your own rules was responsible. Switch back afterwards — no rule is lost, the tier only suspends them.
Hide system noise
Under the tiers is a toggle, Hide system noise, on by default. It uses a built-in list to keep the clutter the system generates out of the way: desktop.ini, Thumbs.db, the recycle bin, pagefile.sys, and on macOS the .DS_Store family.
That list does not use up your rule slots and you never have to maintain it — move to another machine or install an update and the list comes along with the program.
Under Hide these files carry the hidden attribute anyway and are already filtered out, so the switch starts doing real work once you move to Show: you want to see .env and .gitignore, but not have desktop.ini turn up alongside them.
Your own rules
The Rules section is the list you write yourself. Each rule is four things: what it does (hide or show), how the text is read (wildcard or regex), what it matches (the pattern), and which folders it covers (the scope).
Adding a rule
- Open Settings and click Visibility in the General group.
- Click + Add rule. The cursor lands in the pattern box of the new row.
- Type the pattern, for example
*.log. The box's own example reads e.g. *.log or notes.txt. - Press Enter to finish. The rule takes effect immediately; no restart.
While the list is empty the section reads No rules yet. Matching items will stop being listed once you add one.
Once you have collected a few rules, the Filter rules or storage items… box under the header finds them: it filters the rules and the storage list at the bottom of this page together, and reads No matching rules or storage items. when nothing matches.
The two syntaxes
Each rule row carries a two-segment control that picks how the pattern is read:
| Syntax | How it matches | Example |
|---|---|---|
| Wildcard | * matches any run of characters, ? matches exactly one; the whole name has to match | *.log catches every .log file; ~$?????.docx catches the ~$-prefixed Office temp files with exactly five characters in the middle |
| Regex | Your regex, matching anywhere in the name | ^\d{4}- catches names starting with four digits; \.(log|tmp)$ catches .log and .tmp |
Both look at the name only and ignore case, and neither looks at the path — src/*.log does nothing. Use the scope below to limit where a rule applies.
Switching the syntax does not rewrite the pattern for you: *.log flipped to Regex is an invalid regex, so the pattern box turns a warning colour and that one rule stops applying while the rest carry on. Change it to \.log$ and it is a working rule again.
The four scopes
The lower half of each rule row spells out where the rule applies. The whole sentence is clickable and ends in a ▾:
| Option | The sentence on the row | Which folders |
|---|---|---|
| Global | In every folder | Every folder |
| This folder only | Only in D:\Work | That one level; subfolders are untouched |
| This folder and subfolders | In D:\Work and its subfolders | That level plus the whole tree below it |
| Choose folder… | — | Opens the folder picker, titled Choose the rule's scope with a Use as scope button |
Letting one item through
Set the action control to Show and the rule becomes a pass. A pass always beats a hide, regardless of the order the two rules were written in — so "hide every .log but keep build.log" is two rules: *.log set to hide, and build.log set to show.
That is what the footnote under the rules card says: "Show" rules win over "Hide" rules; pick "Show all" to temporarily see everything. Once you pick Show all the rules area dims and the footnote changes to Currently "Show all": no rule applies right now, and system items are not hidden either.
Rules decide what is listed, not what you can enter. A folder hidden by a rule still opens if you type its path into the address bar, and its contents are listed as usual. File Explorer behaves the same way.
Hiding from the context menu
If you would rather not write a rule, right-click a file or folder → Hide. The flyout has four entries, each of which writes the pattern for you:
| Flyout entry | The rule it writes |
|---|---|
| This item only | Just this one, in this one place |
| All by this name here and below | Every item of that name in this tree |
| All by this name everywhere | Every item of that name on the machine |
| Hide all .log files | A whole extension at once; only offered when the item has an extension |
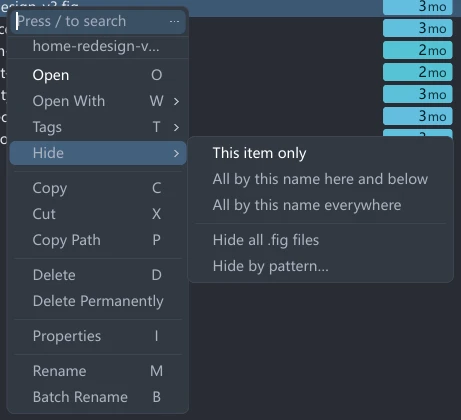
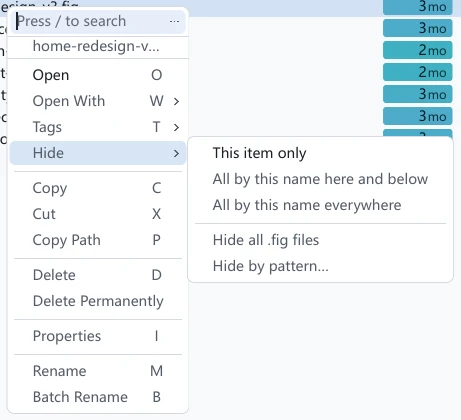
With several items selected it writes one rule per item and shows a single toast. That toast carries an Undo that restores the whole rule table to what it was.
When the item is currently hidden by one of your rules, the same slot reads Unhide instead, as a single entry rather than a flyout.
Hide by pattern
The last entry in the flyout is Hide by pattern…, the one place on this path where you type a wildcard yourself:
- Right-click a file → Hide → Hide by pattern….
- The dialog's first line reads In
Photos. The pattern box is pre-filled with*.<that file's extension>and fully selected, so typing replaces it. - Pick the scope: This folder or Include subfolders. It starts at This folder every time and does not remember your last pick.
- Read the live preview, N items here match, and check that what it caught is what you meant.
- Click Hide.
The preview counts this folder only: ticking Include subfolders does not send it down the tree, so the number leaves out anything the rule catches further down. With nothing matching it reads Nothing in this folder matches.
If the pattern is empty or contains | or ;, Hide is greyed out and the line below reads A pattern cannot contain | or ;.
Hiding storage items
Partitions, WSL distributions and a connected phone work differently: they are not entries inside some folder, so there is no name to match and name rules do nothing to them.
- To hide one: select the sidebar's Storage component page, right-click its row → Hide. The corresponding row in This PC offers the same action. It leaves the sidebar, This PC and the folder picker at once.
- To get it back: the Storage items section at the bottom of the visibility page lists every storage location on the machine with a toggle each — on means shown, off means hidden.
The toggles in Storage items run the opposite way to Hide system noise above. That one means "on = hide"; this section means "on = show" — which is why the card carries the line Turn one off to hide it from the sidebar and This PC. Read it before you flip anything.
The Show all tier covers storage items too: pick it and hidden drives come back into the lists along with everything else.
If the whole Storage component page is missing, check its visibility switch under Settings → Sidebar. That setting is separate from hiding individual storage items here; see Sidebar & component pages.
"N hidden" in the footer
When the current folder has entries your rules filtered out, a N hidden counter joins the cluster in the footer, to the right of the file count.
- It counts only what your rules hid, never system-hidden items. With nothing hidden the counter is absent.
- Hover it and the tooltip reads N items hidden here by your rules, with Click to manage rules on the second line.
- Clicking it goes straight to the visibility page and highlights the rules this folder actually matched, so you do not have to find them in the list.
- When the pane gets narrow enough that the footer drops to icons, this counter is no longer shown.
Settings overview · Storage locations · File operations · Keyboard shortcuts