
Settings overview
Settings is where tessoa keeps every preference: language, theme, keyboard shortcuts, view defaults, and system integration. This page walks the ten groups in the settings panel and says what each entry does, so you can use it as a reference list.
Opening Settings
Settings floats over the main window rather than living in a corner of it. A group rail runs down the left side; click a group name to jump to it. The box at the top reads Search settings… — type and it filters across every group, and shows No matching settings when nothing matches.
The search also reaches entries that live on pages of their own: Animations is on the Appearance page and Show Hidden Items on the Visibility page, and searching either name finds it, with the page it lives on written under the title and Enter going straight there. The whole table on the Keyboard Shortcuts page is in the search too: an action name goes straight to its row, and the current binding matches as well, so searching Ctrl+K answers what it is bound to. The tables on the context menu order, custom commands, Open With and Vim Keys pages still stay out — use each page's own filter row.
Changes take effect immediately and save themselves. There is no OK button, and everything still applies after a restart.
On the six full pages that carry Reset All or Reset to Defaults (Keyboard Shortcuts, Vim Keys, Context Menu Order, Appearance, the view step tables and the details-list columns), pressing it raises Defaults restored: 〈page〉 with an Undo button that puts the whole table back the way it was, and leaves an entry in Activity. Pressing it on a page already at its defaults does nothing at all.
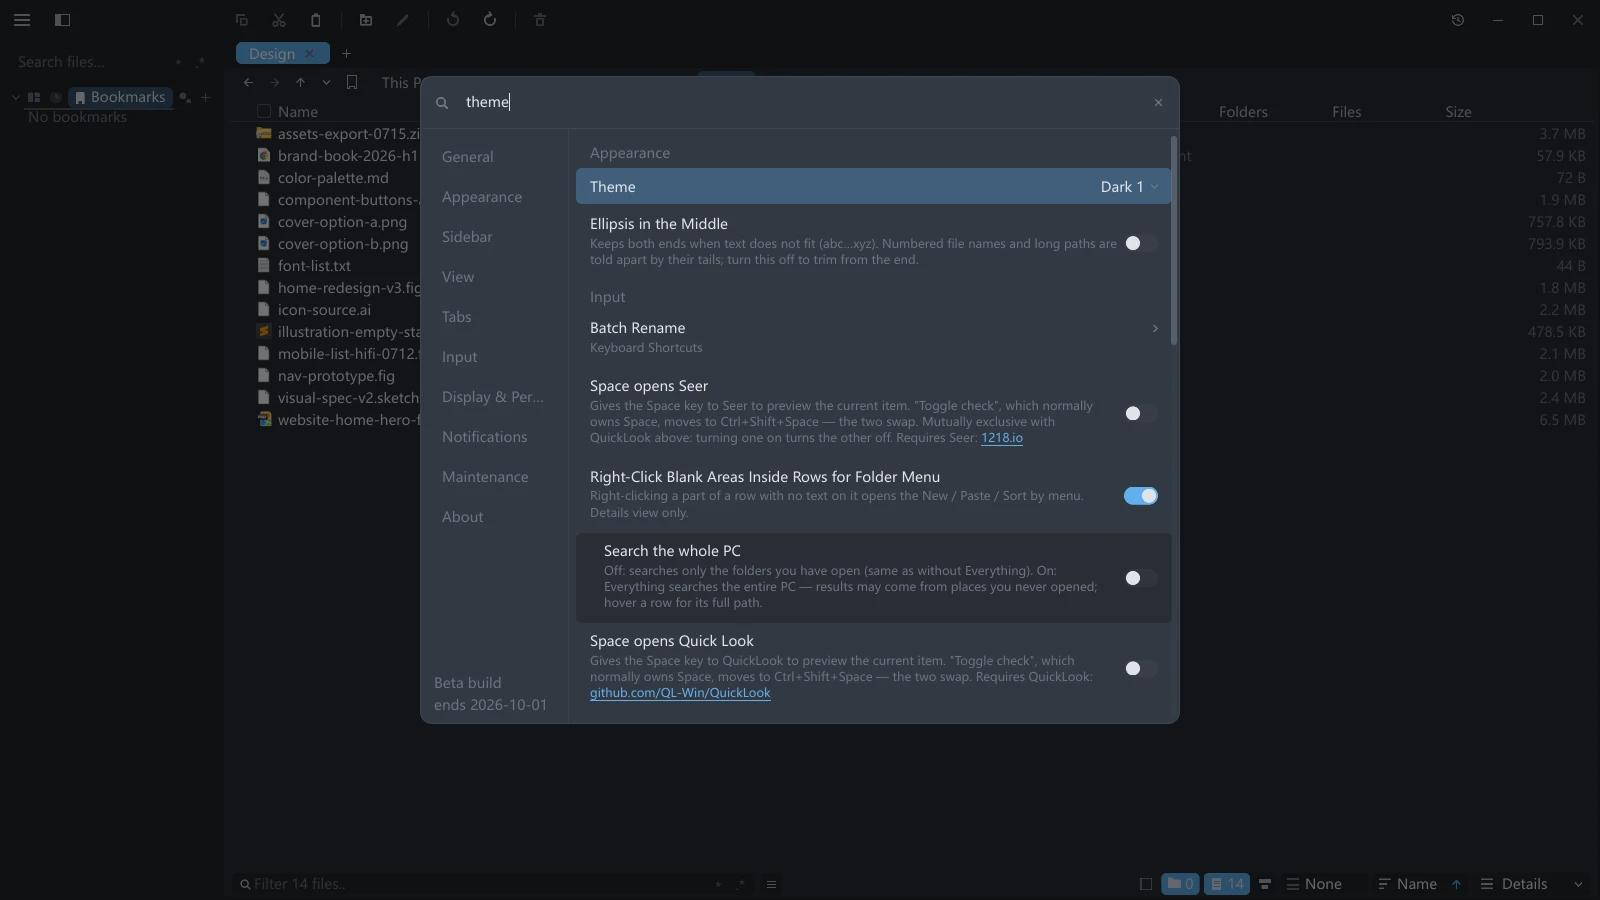
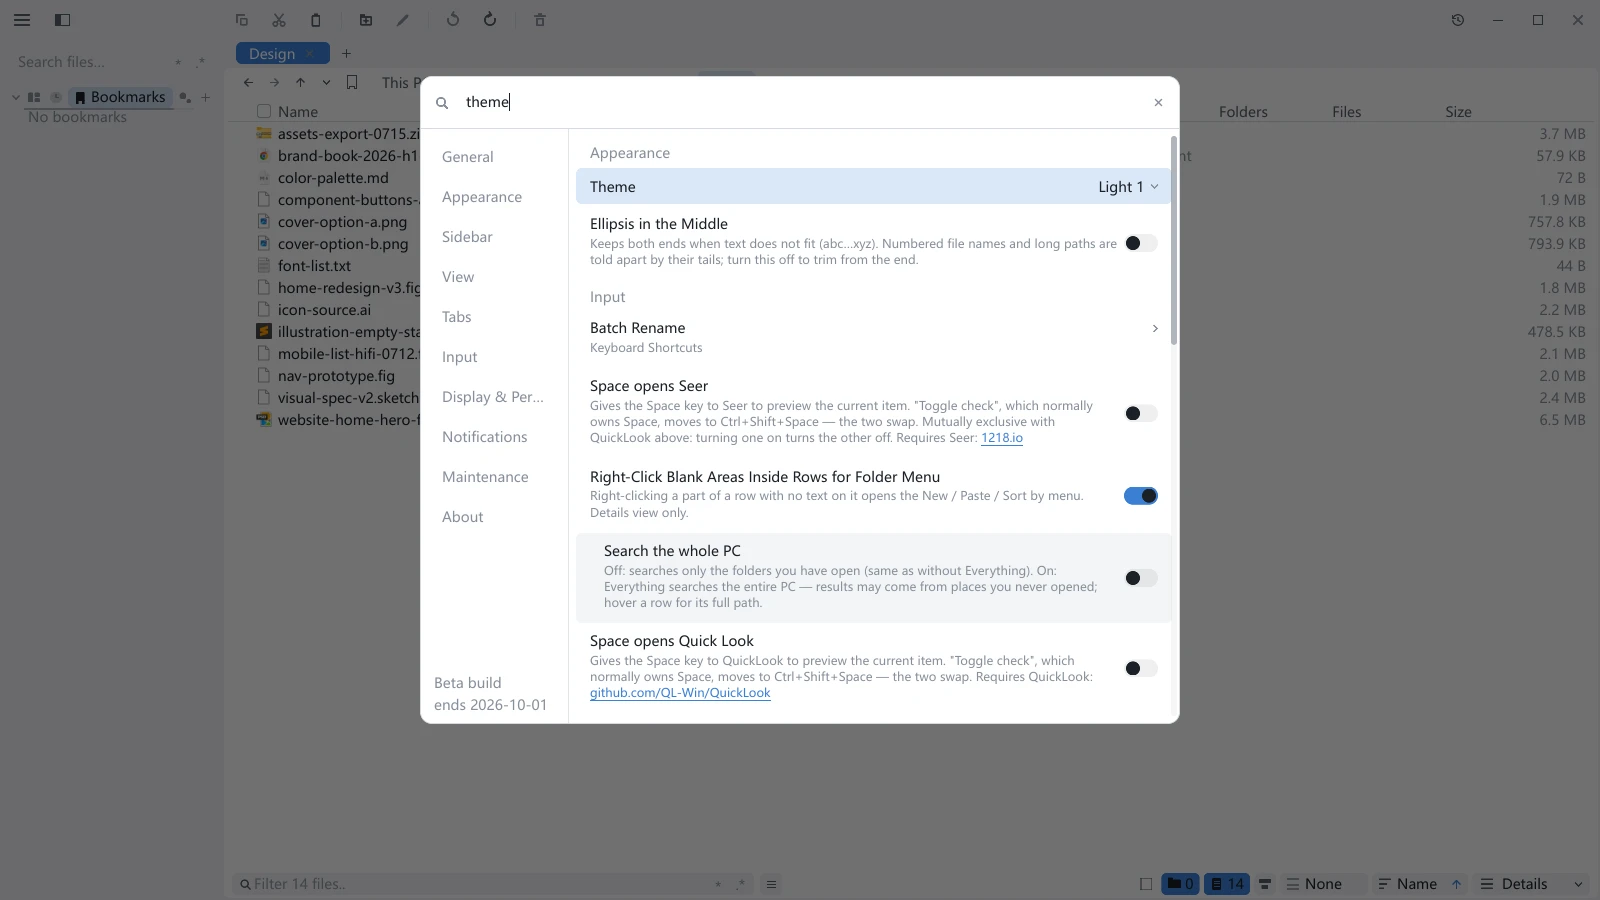
Some entries have child rows that only appear once the parent has a particular value — picking Follow System for the theme, for example, adds two rows for the light and dark mappings. Child rows come and go as a set with the parent's value; nothing is broken.
General
| Setting | What it does |
|---|---|
| Language | Interface language. Each language is listed under its own name, followed by its English name in parentheses (中文 (Simplified Chinese), Deutsch (German)) |
| UI Scale | Scales the whole interface, from 50% to 300%. It only affects tessoa, not other programs, and each screen is recorded separately, see below |
| Visibility | A page of its own: what shows up in the list — three display tiers plus your own rules, see Visibility |
| Calculate Folder Sizes Automatically | Whether entering a folder kicks off a background scan of its subfolders to total up their sizes |
| Name conflicts | What to do by default when a paste, move or extraction finds an item of that name already there, see below |
Language is the one setting whose label carries English in every interface language — it reads 语言 (Language) in Chinese, 言語 (Language) in Japanese — and its options carry English names too. Once the interface is running in a script you cannot read, because following the system picked wrong or you went looking at Japanese and could not get back, those two are how you find your way out. Typing language in the search box finds this row whatever the interface is set to.
Until you pick a language here yourself, tessoa follows the system: it asks for the ordered list of preferred interface languages, tries them from the top, and takes the first one it supports, falling back to English only if none match. Once you have picked one, your choice wins and the system no longer overrides it.
Scale belongs to the screen, not to the program. A screen you never adjusted follows its own system scale, so changing screens, unplugging an external monitor or moving to another machine adapts by itself. A screen you did adjust keeps the value you gave it, and never carries it to another screen.
Once you have adjusted one, a Reset to screen default row appears under UI Scale; clicking it hands that screen back to the system. The row only appears on a screen you have adjusted, and it only covers the screen you are on: clicking it on the laptop panel leaves the setting you saved for an external display alone.
Upgrading from a version before 0.23 records your old scale value against whichever screen you are on the first time it starts, so nothing suddenly looks different, and every other screen begins following the system straight away. If that value was really meant for another screen, click Reset to screen default once on this one.
Adding an interface language yourself
Besides the languages that ship with tessoa, you can drop in a translation of your own without waiting for a release.
- Open Settings and click Export Language Template in the Maintenance group. tessoa writes every string of the current build out as a TOML file and shows a message; click Open Folder on it to get to that directory.
- Copy the template and rename it to the language tag plus
.toml—ko.tomlfor Korean, for instance. - Translate the text to the right of each
=in a text editor. Leave the names on the left, and placeholders like{name}inside braces, exactly as they are. - Save it in the same folder and restart tessoa. The new language now appears under Language.
Translating only part of it is fine; anything you skip falls back to English. If you name the file after a language that already exists (en.toml, say), you are not adding a language — you are overriding that one's strings.
Getting the file wrong will not stop tessoa from starting: a TOML syntax error means the whole file is ignored, and a file with no recognizable strings is not registered as a language. Delete the file and the interface goes back to its default.
What the visibility page holds
Click Visibility to open the page. It has three sections:
| Section | What it covers |
|---|---|
| Show hidden items | Three tiers: Hide / Show / Show all. Ctrl+H flips the first two; the third is only selectable here |
| Rules | Your own list: match names by wildcard or regex, hide or let through, optionally only inside one folder |
| Storage items | Every partition, WSL distribution and portable device on the machine, one toggle each, deciding whether it appears in the sidebar and This PC |
The Show Hidden Items toggle and the separate Hide Rules page that 0.19 and earlier had are now merged into this one page. For a walk-through see Visibility.
On Windows, files and folders carrying the hidden attribute count as hidden items as well. Previously the only test was whether a name started with a dot, so things Explorer keeps out of sight were still listed in tessoa.
Deciding by storage medium
Totalling a folder's size costs almost nothing but reading its children one by one. The same ten thousand files take a fraction of a second on an SSD, several seconds on a spinning disk, and possibly tens of seconds over a network share while eating bandwidth. So on Windows, turning Calculate Folder Sizes Automatically on adds four child switches, one per medium:
| Child switch | Suggestion |
|---|---|
| Solid-State Drives | Leave it on. Random reads are effectively free here, so the numbers cost you nothing |
| Hard Disk Drives | Large folders make the drive audibly seek. Turn it off if that bothers you |
| Removable Media | USB sticks, SD cards, optical drives. Slow, and they can be unplugged mid-scan |
| Network Locations | Mapped drives and shares. The slowest tier; usually worth turning off |
The tier names describe how expensive a scan is, not the hardware: a RAM disk counts as a solid-state drive, an optical drive as removable media.
Also on Windows, volumes whose medium cannot be determined — virtual disks, volumes mounted into a folder, unusual filesystems — are never scanned automatically, and the four switches do not apply to them. Their three statistics columns read Not calculated.
Turning automatic scanning off does not make the numbers unavailable.When you see Not calculated, click that cell and tessoa scans that one folder regardless of the switches. Numbers already computed do not disappear when you turn a switch off either.
macOS and Linux have the master switch but not the four child ones: neither system offers a reliable way to ask what a volume costs to read. The tiers above, and the rule about undetermined volumes, are Windows-only too — on these two systems the master switch being on means every location is scanned as usual, and off means none of them are.
Default for name conflicts
Name conflicts governs what happens by default when a paste, a move or an extraction finds a file or folder of that name already at the destination:
| Value | Effect |
|---|---|
| Ask every time | The default. Stops and raises a card for you to answer, see File operations |
| Always replace | Overwrites without asking |
| Always skip | Keeps what is there and does nothing with that item |
| Always keep both | The source goes in with a number appended |
Always keep both is what 0.16 and earlier did.
The setting is read once, when the job starts. Change it midway through a batch and that batch still finishes under the value it began with, rather than landing under two different rules.
Appearance
| Setting | What it does |
|---|---|
| Theme | Follow the system, pick one of the built-in themes, or use one of your own schemes; the last entry, New scheme…, creates one |
| When system is light / When system is dark | Only shown when the theme is Follow System: which theme to use on each side |
| Appearance | A full page of its own, see below |
| Quick Bar | A page of its own: the strip across the top of the window that merges favorites and buttons — turn it off, or change which buttons it holds, see Quick bar |
| Zebra Striping | Tints every other row so long lists are easier to read across |
| Ellipsis in the Middle | Keeps both ends of text that does not fit and drops the middle (abc…xyz). Off by default, which trims from the end |
| Flat Folder Icons | Uses flat folder icons. Off on a fresh installation, which uses native system icons; upgrading preserves the existing choice |
There are five built-in themes: Dark 1, Dark 2, Gray, Light 1, and Light 2. Follow System defaults to switching between Dark 1 and Light 1.
0.24.0 updates the built-in palettes. Bronze Snow and Sea Salt become Dark 1 and Light 1 respectively; Obsidian maps to Gray, Latte to Light 2, Clear to Light 1, and the other retired built-in schemes to Dark 1. Built-in themes look different after upgrading; schemes you saved yourself remain unchanged.
Set the color of flat folder icons independently through Folder icon in the custom color editor. Changing Accent no longer changes that color. Native folder icons retain system colors; folder thumbnail cards still use the Folder icon color.
Ellipsis in the Middle covers interface text that does not fit: file names, paths, tab titles and menu entries alike. Text boxes put no ellipsis in the first place, so this setting does not touch them — see File operations: Rename. Turn it on where names are told apart by their tails — a whole batch of IMG_20260814_120001.jpg, or long paths that differ only in the last level or two, all look identical once trimmed from the end. Where the prefix is the identity instead (2026-08-14 meeting notes v3.docx), leaving it off suits better. The change is visible right away, with no restart.
The Appearance page tunes layout details, and the window behind it updates as you drag:
| Entry | What it does |
|---|---|
| Font | Interface typeface, System Default to start; the box above filters the font list |
| Font Weight | How heavy interface text is, see below |
| Font Size | Interface text size, 10–20 px |
| Spacing | How tightly rows are packed, 75%–150% |
| Corner Roundness | Corner radius on controls and the corners of panes |
| Tab Outline | Outline opacity for inactive tabs, 0%–100%, default 45%; 0% turns the outline off |
| Tab Outline Width | Outline width for inactive tabs, 1–3 px, default 1 px |
| Text Gamma | How dark the edges of glyphs come out, 0.60–1.60, see below |
| Subpixel Positioning | Places each glyph at subpixel precision; on by default |
| LCD Subpixel Antialiasing | Uses horizontal resolution three times over; off by default, see below |
| Glyph Hinting | Whether stroke stems snap to whole pixel boundaries; three values, Off by default, see below |
| Classic Text Engine | Windows only. Uses the built-in text rendering from before v0.21.0; on by default, see below |
| Animations | How strong the motion is, or off entirely |
| Reset to Defaults | Puts the page back |
Font weight
The steps on this slider are the weights the current font actually has, not a fixed nine. Change the font and the number of steps can change with it: Microsoft YaHei has three (290 Light / 400 Regular / 700 Bold), while a family with a full range such as Source Han Sans gives all nine. The ticks on the track are those steps, so you can see at a glance how many weights a font distinguishes.
This is so that "change the weight" never turns into "change the font". Ask for a fixed set of nine and some of them will not exist in the current family — at which point the system goes looking for an exact match in a different font, and a line of mixed Latin and CJK ends up drawn in two typefaces. Taking the steps from the family itself means what you pick is always one of its own weights.
A font with only one weight leaves this row unadjustable; the value still tells you which weight that is.
Text rendering settings
None of these affects layout. They only change how each glyph is drawn.
| Entry | When to touch it |
|---|---|
| Subpixel Positioning | Letter spacing looks uneven. It is on by default — this one fixes a defect, it is not a matter of taste |
| Text Gamma | Dense glyphs look mushy (turn it down) or too thin (turn it up). 1.00 changes nothing |
| LCD Subpixel Antialiasing | Stroke edges look furry on a low-resolution display. Off by default |
| Glyph Hinting | Text looks ragged after turning system scaling up. Off by default |
| Classic Text Engine | Text in this release looks worse to you than it used to. On by default |
LCD antialiasing is off by default for a reason: it assumes your display's subpixels are laid out as horizontal RGB stripes. That does not hold on OLED panels, on a display turned on its side, or on BGR panels, and the cost is visible colour fringing. Turn it on and look: keep it if text is sharper, turn it off if you see fringes. On a graphics card that cannot do it, tessoa quietly falls back to ordinary rendering and nothing looks out of place.
Glyph Hinting decides whether stroke stems are pushed onto whole pixel boundaries: doing so stops a stroke smearing across two half-lit columns and makes text sharper, at the cost of glyphs sitting further from their designed shapes. It has three values:
| Value | What it means |
|---|---|
| Off | No snapping, and the most faithful glyph shapes. The factory default |
| Follow Font | Do what the font itself asks for. Fonts usually stop asking for it above a certain size |
| Force | Ignore what the font asks and snap at every size |
Force is meant for machines with system scaling turned well up: above about 150% the physical size of body text crosses the threshold the font sets, Follow Font becomes equivalent to Off from there on, and text starts to look ragged — this value brings that snapping back. Below that threshold Force and Follow Font draw pixel-for-pixel the same thing.
Classic Text Engine (Windows only) picks which engine draws the glyphs. On, it is the built-in engine from before v0.21.0; off, it is the pipeline introduced in v0.21.0 that matches a browser pixel for pixel. It ships on: the feedback that followed that release measured the new engine against the previous tessoa rather than against a browser, so the choice goes back to you. The two have different characters — the newer one's greyscale is closer to binary with harder edges, the classic one's edges fade more gradually. Which one reads better is a matter of taste; flip it and look.
Changing Text Gamma, LCD Subpixel Antialiasing, Glyph Hinting or Classic Text Engine makes every glyph on screen be redrawn, so there is a brief pause. That is expected.
These rows vary by platform: Classic Text Engine exists on Windows only. macOS drops two more — there, LCD Subpixel Antialiasing does not produce its stated effect (the system removed subpixel antialiasing long ago) and changes the font weight as a side effect, and Glyph Hinting draws exactly the same thing at every value (CoreText has it built in). Whatever you set on Windows stays saved and is not altered by the other platforms.
Schemes of your own
The last entry in the Theme dropdown is New scheme…: clicking it copies the current theme into a new scheme, gives it a default name, and opens the color editor. Each scheme you build is listed as its own entry in the dropdown, up to 32 of them.
Inside the editor:
- The title at the top is that scheme's name. Click it to rename, and every keystroke is saved.
- Delete scheme, also at the top, removes the scheme you are in. You land on the neighbouring one; delete the last one and the theme falls back to a factory one.
- Under Follow System the light and dark sides can each carry a different custom scheme. Hang the same one on both and a toast points it out — Both sides use the same custom scheme, so nothing changes when the system switches — as a note, not a refusal.
A theme you build yourself can travel to another machine. The color editor also has Export and Import at the top: Export copies the whole palette to the clipboard, and opening this page on the other machine offers to import what it finds there.
Sidebar
This group decides which pages appear in the sidebar and whether the folder tree follows the current folder. Switch pages through their tabs, or show them in separate panes; see Sidebar.
| Setting | What it does |
|---|---|
| Recents / Bookmarks / Storage / Places / Tags / Layouts | Whether each page is shown in the sidebar; visible by default |
| Open Tabs | Hidden by default. Lists every tab in each pane of this window; click a row to switch to it |
| Follow Current Folder in Tree | On by default. The sidebar expands to the current folder and scrolls to it as you navigate; turn it off and the sidebar stops moving with you, see Interface tour |
| Clear Recent History | Wipes the Recents statistics immediately |
Hiding a page does not delete its data. Hiding Tags preserves the library and file tags; hiding Recents keeps recording visits. Use Clear Recent History to clear those statistics.
Hidden pages keep their order in the sidebar layout and return to their position when shown again. See Sidebar for splitting, collapsing and reordering tabs.
View
| Setting | What it does |
|---|---|
| View Configuration | A page of its own: the View Settings Belong To row, the zoom-step tables for each of the four views, and full-resolution decoding per icon step |
| Folder hover spread | How a folder's stack of thumbnails fans out under the pointer: Arc, Deal, Row, Stair, or Off |
| Age Badge Colors | Spectrum, Spectrum, Flat, Green to Blue, Saturation, or Quiet; default Spectrum |
| Age Badge Style | Solid, Tinted, or Text Only; default Solid |
| Age Color Mapping | Continuous or Stepped; default Continuous |
| Age Badge Chroma | 40%, 70%, 100%, or 130%; default 100% |
| Keep Folder Expansion While Grouped | Whether folders can still be expanded in place while grouping is on; on by default, see View modes |
| New Tab View | Which view a tab opened with Ctrl+T starts in; Match Current reuses whatever you are looking at |
| New Tab Icon Size | Only shown when the entry above is set to Icons: the starting icon size |
| List view columns | A page of its own: which columns the details list shows and in what order, see Arranging the interface |
The four Age settings adjust the age badges in Details; see Age badges. Column visibility, order and width still belong to the column-header menu or List view columns.
View Settings Belong To, at the top of the View Configuration page, decides whose view a view change, a sort change or a modifier-plus-wheel zoom actually changes:
| Value | Reaches |
|---|---|
| Current Folder | This folder. It is recorded and reapplied next visit, see View modes |
| Current Tab | Only the tab you are looking at (the default) |
| Group Tabs | Every tab in the same pane |
| All Groups | Every tab in every pane |
Once you have used Current Folder, the page carries one more row, Clear Folder View Memory, which empties everything recorded so far.
The zoom-step tables define where each notch of the wheel lands. Percentage steps run from 50% to 300%, icon steps from 16 to 512 px. There is no limit on how many steps you add — you can keep going until the range itself is full, at which point the + Add level row greys out. Reset Tables puts them back.
Both ceilings went up a notch for 4K and 5K displays: a 256 px icon cell is a small fraction of the short edge of a 5K screen.
Each step row in the Icons group also carries a checkbox, which decides how large a thumbnail that step decodes. A ticked step decodes at full resolution; an unticked one draws a 256 px thumbnail scaled up. The line under the group reads Ticked levels decode at full resolution. Same display size, just no longer an upscaled 256px thumbnail — sharper, and heavier on VRAM. Only the largest step is ticked out of the box.
Ticking a step does not change the size of the cell, only the sharpness of the image drawn in it. Below 24 px the checkbox is greyed out and that column reads n/a for small icons — those steps draw the thumbnail into a fixed 16 px square, where 256 px is already more than enough.
System icons are the exception: they top out at 256 px, so non-image files on the larger steps are still scaled up whether or not the box is ticked.
Tabs
| Setting | Values |
|---|---|
| Tab Width | Shrink: narrows tabs when space runs out. Full Name: each tab's width follows its own content; the default |
| Tab Overflow | What happens once a row is full. Wrap Rows: the tab bar grows to several rows. Scroll: it stays one row and scrolls sideways |
| Tab Group Number | The shape of the number badge at the left end of a tab bar: Circle Badge (the default), Keycap or Corner Mark |
| New Tab Position | Where a newly opened tab is inserted: At End, or Right of Current |
| New Tab Folder | Which folder a new tab starts in, see below |
| Specific Folder | Only shown when the entry above is set to Specific Folder: type a path and press Enter, or click Browse… at the end of the row |
| Focus New Tab When Opened | While this is off (the default), a tab opened with "Open in New Tab" loads in the background and your current view stays put |
| History Dropdown: Hide Repeated Paths | In the nav bar's ▾ history list, each folder appears once — the entry closest to where you are now |
| Address Bar: Current Location Only | With this on, going up no longer leaves the deeper path segments greyed out in the address bar |
The first time 0.24.0 reads an older configuration, it changes Tab Width from Shrink to Full Name, including configurations where Shrink was chosen manually. To keep the old choice, select Shrink again under Settings → Tabs → Tab Width; later launches preserve that choice. Under Full Name, shorter and longer names receive different widths, and Tab Overflow determines whether excess tabs wrap or scroll.
Tab Group Number only sets the shape, not whether the badge is there: it appears on its own once the window has two or more tab groups, or holds a preview tab. See Tabs & split panes.
The two deliberately cover different ground: New Tab Position applies to every new tab, including Ctrl+T, while Focus New Tab When Opened only applies where you explicitly asked for a new tab (context menu, middle-click, Ctrl+Enter, and opening a sidebar search result in a new tab). Ctrl+T always focuses, whatever this switch says. See Open in a new tab.
New Tab Folder takes three values:
| Value | Where a new tab lands |
|---|---|
| Match Current Tab | The folder you are looking at |
| Home | Your home folder |
| Specific Folder | The path you filled in |
It only governs new tabs that have no destination of their own — Ctrl+T and the + on the tab bar. Things like Open in New Tab already carry a target and are unaffected.
Paths may use ~ and %VARIABLE%. A folder that does not exist is not saved, and you get That folder doesn't exist, not saved; if it is deleted after you saved it, new tabs fall back to the default location rather than opening a tab full of errors.
To avoid typing a path at all, click Browse… at the end of that row: a folder picker floats up, titled Choose starting folder, and you browse to one.
History Dropdown: Hide Repeated Paths only changes what that ▾ list shows. Back and forward themselves still walk the complete history, and no step is skipped.
Address Bar: Current Location Only is off by default. While it is off, going from D:\Photos6\Summer back up to D:\Photos leaves 2026 › Summer behind in grey, one click away — the way File Explorer does it. Turn it on and the address bar stops at the folder you are in.
Input
| Setting | What it does |
|---|---|
| Keyboard Shortcuts | A page of its own for rebinding keys; the mouse buttons and wheel gestures are on it too, see Keyboard shortcuts |
| Context Menu Order | A page of its own: drag menu entries into the order you want, decide one by one whether each appears, and configure accelerator keys, see Arranging the interface |
| Custom Commands | A page of its own: add your own entries to the right-click menu, see Custom commands |
| Open With | A page of its own: which programs are pinned into the right-click Open With flyout, see Open With |
| Shell Extensions | A page of its own, Windows only: decide one by one whether the menu entries other software installed get loaded, see Shell extensions |
| Drag | What dropping a file inside the window does by default: Copy, Move, or Ask |
| Ctrl + drag | Which of those holding Ctrl switches to |
| Single-Click to Open Folders | With this on, one click enters a folder instead of two |
| Right-Click Blank Areas Inside Rows for Folder Menu | On by default, Details view only. Right-clicking a part of a row with no text on it opens the New / Paste / Sort by menu, see below |
| Double-Click Empty Space to Go Up | With this on, double-clicking empty space in the file area goes up a level. Column view is unaffected |
| Type to Filter | On by default. Typing a letter or digit in the file area starts filtering, with no Ctrl+F first, see Working with files |
| Vim Mode (j/k navigation) | Turns on full keyboard control, see Vim mode |
| Vim Keys | A page of its own: rebind Vim mode's keys one by one, in three tables — File area / Sidebar / Command palette — see Changing the Vim keys. It works with Vim mode switched off too |
| Space opens Quick Look | Windows only: hands Space over to QuickLook, see Quick Look |
| QuickLook status | A read-only row whose right end shows what tessoa detects right now; click the row to check again |
| Space opens Seer | Windows only: hands Space over to Seer instead. Mutually exclusive with the switch above — turning one on turns the other off |
| Seer status | The same as QuickLook status, for Seer |
| Speed up search with Everything / Speed up search with Spotlight | The former appears on Windows, the latter on macOS. On by default and applies only to sidebar search. Absent on Linux; see Search and filtering |
| Search the whole PC | Off by default and shown only when index acceleration is on. Lets the indexer return results outside open folders; an unavailable index does not trigger a whole-disk scan |
| Everything status / Spotlight status | Shows detection results for the platform's indexer; click to check again. Remains visible with acceleration off |
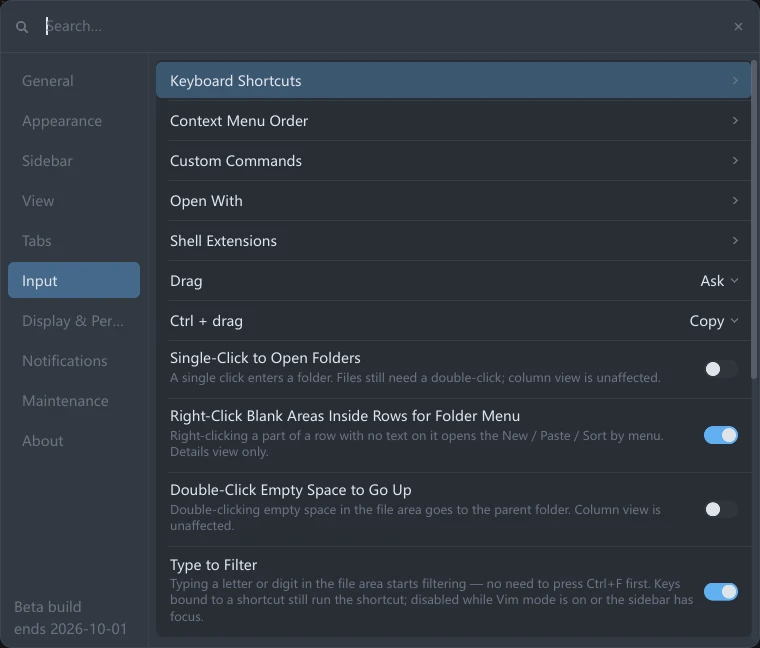
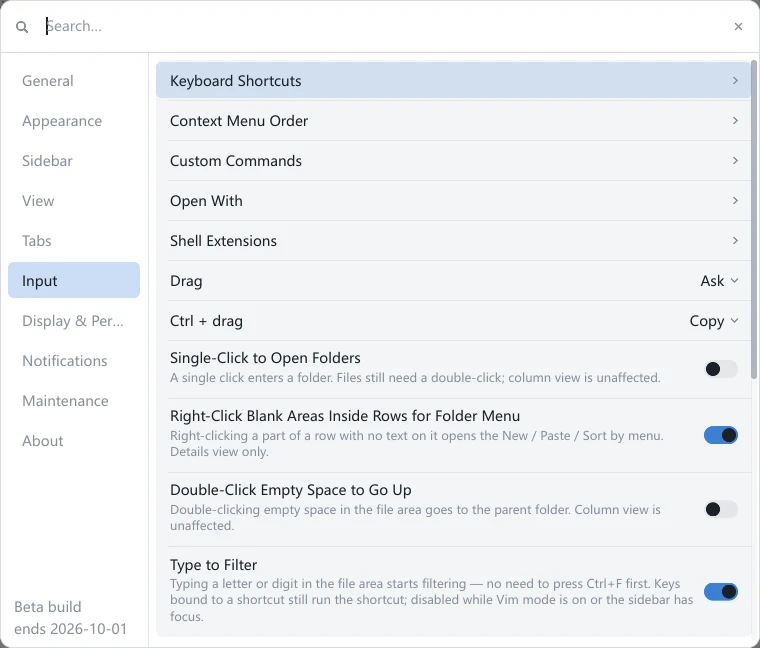
Right-Click Blank Areas Inside Rows for Folder Menu covers the part of a row in Details view with no text on it: to the right of the name, outside each column's text, between columns, and the strip at the far right. With it on, right-clicking there opens the folder's blank-space menu; turn it off and right-clicking the right half of a row acts on that row instead. Left-click behaviour on that area is not affected by this setting: a single click still selects the row, a double-click still opens it, and holding and dragging still draws a selection box.
Rows you selected or checked are outside this setting: right-clicking the blank part of such a row always opens the file menu, acting on the whole batch, because a selected row stands for the batch. See Working with files.
It is on by default because when the list fills the window there is no blank space left to call that menu up from, and New Folder and Paste are only in that menu.
Single-Click to Open Folders is off by default and only covers folders: files still need a double-click, and column view already opens on a single click so it is unaffected. To select a folder without entering it, move the cursor with the arrow keys or tick it with Space.
Drag and Ctrl + drag only cover drags inside the tessoa window. If you drop a file outside it — into a mail client or a chat window, for example — the receiving program decides what happens. Files dragged in from another program follow File Explorer's rules and ignore both settings, with one exception: with Drag set to Ask, drops from outside open the menu too.
Besides ordering, the Context Menu Order page handles the letter accelerators in menus:
| Entry | What it does |
|---|---|
| Menu accelerator keys | The master switch. Each menu row gets a letter; press it while the menu is open to run that row |
| Show accelerator keys uppercase | Changes only how they are drawn, not which key works |
| Case-sensitive accelerator keys | With this on, an uppercase keystroke no longer matches a lowercase accelerator |
| Enter search (menu search box) | The key that switches from accelerators back to typing a search, / by default |
| Lock in-menu drag reorder | Stops you from dragging rows out of order by accident, see Arrange the interface |
| Reset Order | Puts every menu back in its default order |
A row that has no accelerator yet reads Not set in the key column.
Display & Performance
| Setting | What it does |
|---|---|
| Graphics | Which card renders. The list marks each one iGPU, dGPU, or vGPU; the window reopens once after a change |
| Frame Rate Cap | Follow Display (with the measured refresh rate in parentheses), 30 FPS, 60 FPS, 120 FPS, or Custom |
| Custom Frame Rate | Only shown when the entry above is Custom; adjustable from 10 to 360 FPS |
| Window Size | Sets the client area to an exact pixel size: 1280×720, 1600×900, 1920×1080, or 2560×1440. Useful for screen recording and screenshots |
| Show Frame Rate | Puts a translucent frame rate readout in the bottom-left corner, for diagnosing stutter |
| Show Memory Usage | A second readout, listing Preview VRAM, Text Cache and Process line by line |
| Preview cache | How much memory previews may hold on to: Save memory, Balanced, Performance, Custom |
| Preview VRAM budget / Text cache budget | The two sliders shown when the entry above is Custom |
Preview cache decides whether the files you just looked at are kept around as you click back and forth. Keep more and returning to a file is instant; keep less and you save memory. The three presets cover the usual trade-offs; Custom lets you set the numbers yourself.
Turning the budget down does not throw everything away at once — whatever is on screen right now is always kept, otherwise the display would flicker every time you lowered a notch.
The frame rate cap saves power; it does not add speed.Vertical sync is always on, so the frame rate cannot exceed your display's refresh rate anyway — picking 120 on a 60 Hz screen changes nothing. The cap only applies while frames are actually being produced, during animation, scrolling, and dragging. When the picture is still tessoa draws nothing at all, and the readout says idle rather than 0.
Notifications
This group covers when, and in what form, tessoa tells you something.
| Setting | What it does |
|---|---|
| Toast duration | How long the on-screen message stays: Short, Standard, Long, Very long |
| Notify when a cache is nearly full | Says so once when the preview VRAM or text cache is running out of budget. On by default |
| Activity History | How many Activity entries to keep: Off, 50 entries, 200 entries (default), 1000 entries |
| Activity Panel: Auto-Collapse When Unfocused | On by default. The activity panel puts itself away when you click outside it or the window loses focus |
Toast duration and Activity History are two ends of the same thing: the toast covers the moment you finish, and activity covers looking it up afterwards.
Turn Activity Panel: Auto-Collapse When Unfocused off and the panel stays open, which suits working in the file list with the panel next to it.
Notify when a cache is nearly full fires once when usage reaches 90% of its budget, and the toast carries an Open settings button that takes you straight to the Preview cache row. It can only fire again after usage has dropped back below 75%, so it does not repeat around the threshold. The notice is written to activity too. The budgets themselves live in the Display & Performance group.
Setting Activity History to Off clears the existing entries on the spot. This setting governs whether tessoa records at all, not whether it stops adding new entries from now on. To clear once and carry on recording, use Clear history at the bottom of the activity panel.
Maintenance
This group covers what is installed on this machine — plugins, system integration, and a few one-off clean-up actions.
| Setting | What it does |
|---|---|
| Enable preview plugins | Whether preview plugins are loaded at all. With this off, installed plugins do nothing, see Preview plugins |
| Suggest installable preview plugins | Whether preview mentions a plugin when you open a format that needs one |
| Preview plugins | A page of its own: what is installed and what else is available, see Preview plugins |
| Install / Integrate | Windows only. A page of its own: install location, desktop shortcut, right-click entries. See Install & download |
| Keep running in the background on close | Windows only. Stays in the system tray after the last window closes, so reopening is instant; off by default, see below |
| Clean Up Stale Tag References | Clears tag records pointing at files that no longer exist, see Tags |
| Import Tags from Finder | macOS only. Reads Finder's tags into tessoa, once and one way; nothing is written back to Finder |
| Export Language Template | Writes out every string of the current build, for adding a language or rewording one |
With Keep running in the background on close on, closing the last window no longer quits: the window is hidden, the process stays in the system tray, and opening tessoa again brings the window back as it was, skipping the whole startup. The tray icon's right-click menu holds Show and Quit, and Quit really does quit. Settings and the session are written out before tessoa goes to the background, so your work is safe even if the process is later ended from Task Manager. The setting is Windows-only: its value comes from the next start landing back in this already-running process, and that hand-off only exists on Windows.
About
| Setting | What it does |
|---|---|
| Version | Read-only, shows the version you are running |
| Auto-check for Updates (daily) | Whether to check for a new version once a day in the background |
| Auto-install Updates (applies on restart) | Subordinate to the entry above and on by default: a new version is installed in the background, ready the next time you start tessoa |
| Check for Updates | Check right now |
| Send Anonymous Usage Statistics | Whether to send one anonymous statistics report a day, see below |
| Documentation | Opens this site in your default browser |
| License | A page of its own: license status, activating a key, releasing a device |
| Beta Feedback | Beta builds only; opens the feedback form |
| Third-Party Licenses | Opens the full third-party license list in your browser |
| Terms & Privacy Policy | A page of its own, scrollable in full |
Auto-check for Updates (daily) and Check for Updates follow the version number directly, both in the About group.
When a newer version has been found, the bottom of the group rail carries a standing line reading Update: vX.Y.Z, which does not disappear the way a toast does. That line can be clicked: clicking it starts the update, and tessoa downloads, verifies and replaces in the background, then restarts, with the progress drawn over the window. Where an in-app update is not possible (see Install & download) clicking opens the download page instead. Clicking again while a download is running does nothing, and the progress is not thrown back to 0%.
Auto-install Updates (applies on restart) is on by default. With it on, tessoa downloads, verifies and swaps in a new version in the background as soon as it finds one, without restarting and without interrupting you: the only message you get is Downloading vX.Y.Z in the background at the start, and nothing at all in between. Once the swap is done, Updated to vX.Y.Z — restart to apply appears with a Restart Now button on it, and the standing line on the left changes to Ready: vX.Y.Z. Clicking that line restarts straight away, without asking again.
Clicking the standing line while a background download is running takes the update over: the progress becomes visible, and tessoa restarts when it finishes as usual. If an update cannot be installed, nothing is said on screen — you never asked for this one — but the standing Update line is still there and updating by hand still works. tessoa will not try that same version automatically a second time, so it doesn't spend tens of megabytes on it every day. Turn the setting off and updates behave as they used to: you are told, and the download starts when you click.
Send Anonymous Usage Statistics decides whether tessoa sends one report a day. That report contains a randomly generated installation number, the tessoa version, whether it is a beta build, the operating system and its version, the CPU architecture, the interface language in use, and which version was reported last time. It contains no paths, file names, user names or license keys, and nothing about what you opened. At most one report a day is sent, and none at all before you accept the Terms & Privacy Policy. Turning the setting off stops it; machines with the DO_NOT_TRACK environment variable set don't send anything either.
While no license is active, the License page offers one more button, Apply for beta access, which opens the beta sign-up form in your browser.
The places on screen that say something needs a license are now clickable: Unlock on the upgrade toast, Open settings on the matching activity entry, and the button under the notice in the middle of the preview area all land on the same About › License page.
On a beta build, the bottom of the group rail also carries two lines: Beta build, and ends YYYY-MM-DD. That date is this beta build’s shared cutoff — everyone sees the same one, and it has nothing to do with the expiry on the key you activated; what runs out is the build itself. The License page shows the same date on a beta build, written as Beta ends: YYYY-MM-DD (same for everyone).
Where settings live
Preferences are written to disk as you change them, independently of which windows you have open. Tags and layouts work the same way. Which folders are open is a different matter — that belongs to the session.
Which folders you had open is recorded when you quit normally, so a crash or a force-quit can lose that one session and you start again from the last clean exit. Tags and layouts are saved as you go and are generally unaffected.
Keyboard shortcuts · Activity · Vim mode · Install & download · View modes